Install
SiloWeigh, SiloWeigh.Net
|
SiloWeigh and SiloWeigh.Net silo weighing systems are self-install kits. You can do it yourself with a little practice, and we provide the tools for practice before you start, so that you won't mess up the real job. We also provide some spare gauges - the critical components - because we recognize that even a careful workman can mess up every once in a while! Now read on and see how simple it really is.
Click on the pictures to see full size shots
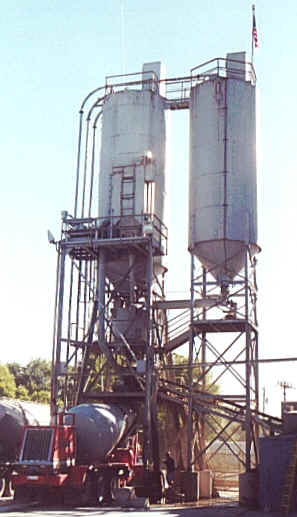
We photographed the SiloWeigh installation at Sinelli Concrete's ready-mix plant, in suburban Detroit. Lynn Carnacchi is shown installing the system on one of their two silos. Other installations are marked as such.
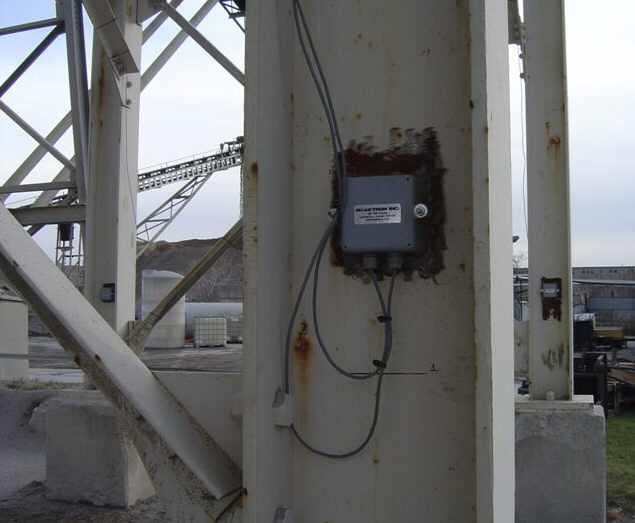 Choose the location
The location which gives best weighing accuracy is in the middle of the longest unobstructed run of the silo leg, but it should also be in a place where it is easy to work. Our manual gives you some tips but you make the choice. Here, we chose to install in the centre of the section of leg shown in the picture. You can see three of the weatherproof boxes on separate legs in this picture (courtesy CBM Concord, Ont. Canada.)
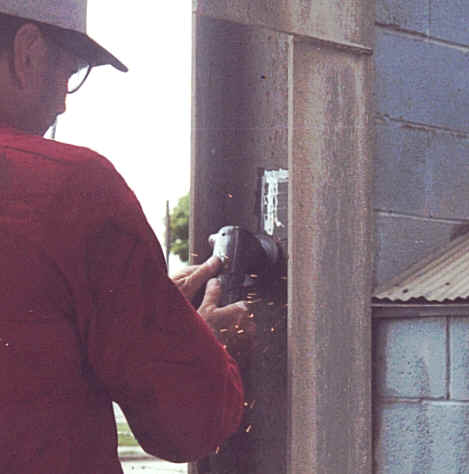 Prepare the surface
Grind the surface down to bare metal over a 4" square area on both the front and back of the silo leg, then smooth it with a sanding disk until flat and perfectly smooth. This is the surface on which the gauges will be welded. Next drill three holes using the template supplied. After deburring the holes, clean the area with paint thinner and you are ready to start welding.
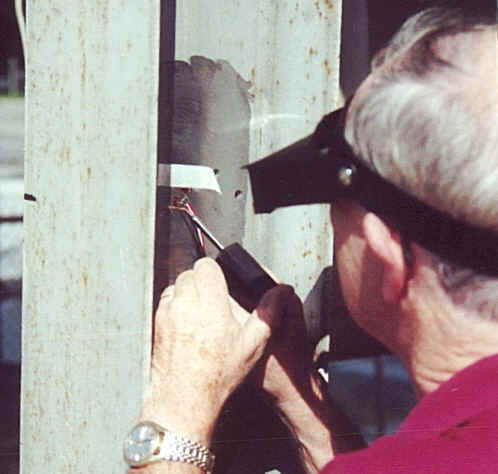 Weld the gauges
Try out the welder by welding the practice piece included with the kit onto a piece of scrap steel. You'll find that it seems tricky at first but practice makes perfect. Tape the gauge onto the prepared surface using the template supplied, then carefully weld around each of the two gauges in the order detailed in the manual. Along with the welder, we supply the magnifying visor shown in the picture to make the job easier.
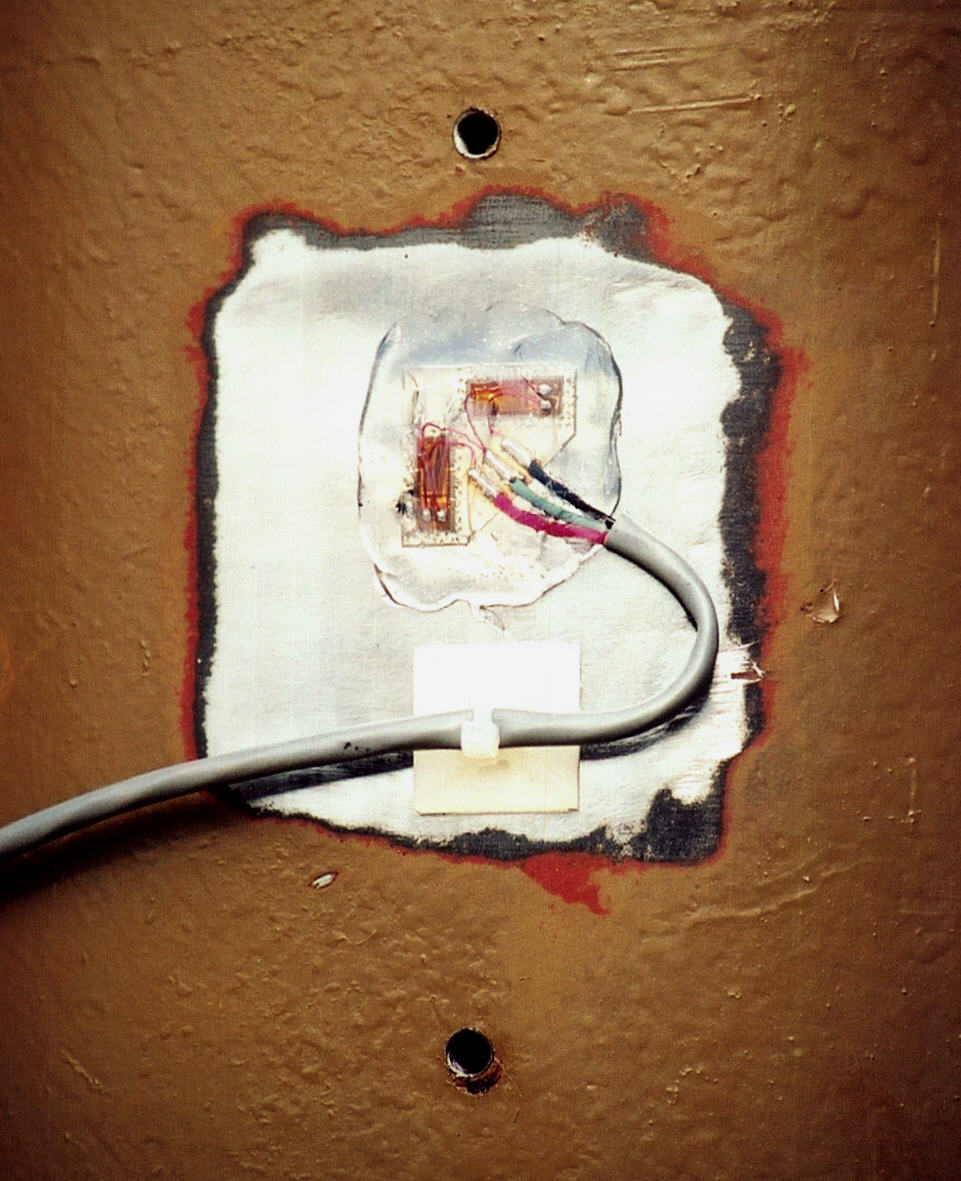
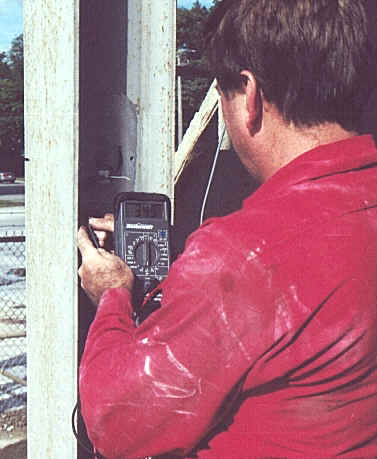 Test the gauges
Once the gauges have been welded in place, feed the wires from the rear gauge through the hole provided and secure all wires with the sticky pad and Tyrap provided. Test the gauges for continuity and isolation from the beam using the digital meter supplied. When you are satisfied, coat the gauges with the protective coating supplied in the "nail varnish" bottle.
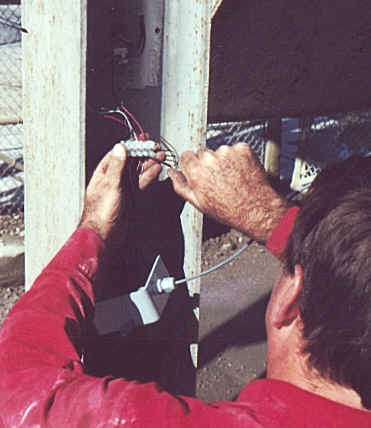 Make the connections
Connect the gauge wires to the screw connector block and then connect each leg to the next in daisy-chain fashion, using the cable provided, passing them through the seals in the waterproof covers first. At each connector block, match all identical colors together for foolproof connection. The final connection is to the cable which goes to the indicator, mounted in a convenient indoor location.
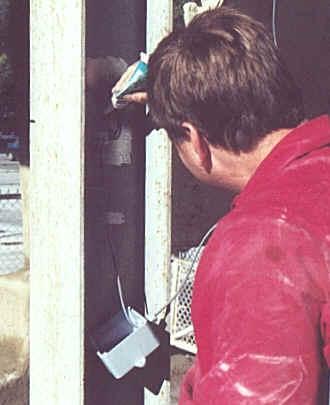 Weatherproof the installation
Apply a thin layer of the silicone RTV sealant over each of the gauges to prevent rust or corrosion. This is the primary protection for the gauges and will weatherproof the installation without anything further. To be doubly certain, however, we include protective covers (seen at bottom of picture) which seal out water as well as giving mechanical protection.
The finished gauge, with its two protective coatings, looks like this. Note that this is a "round leg" installation, where the covers are installed with bolts vertically aligned, rather than horizontal (courtesy Taeshin, Korea).
 Round legs are handled
differently
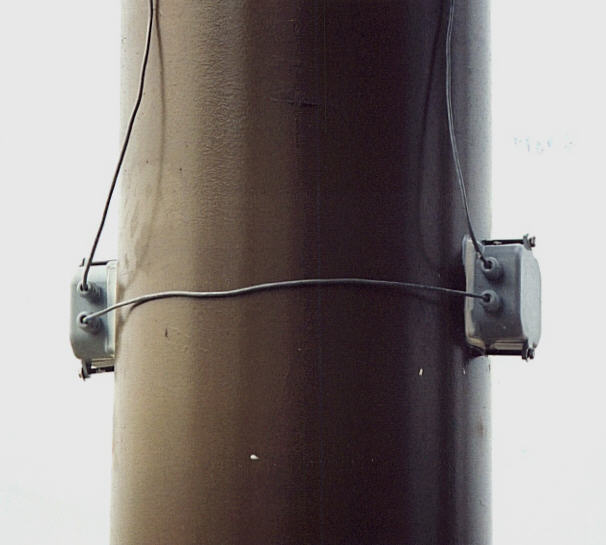
Round legs are handled
differently
"H" section legs have the gauges installed on the back and front of the leg, with the wires running from the back to the front through a hole. This is impossible with "O" section legs, so the gauges and covers are installed on opposite sides of the leg and wired together externally. In all types of leg, the gauges of each leg are connected to the next in "daisy-chain" fashion.
 Seal and fasten cover
Run the two long bolts through the rear cover fastening lugs and thread them through the holes in the beam, pulling the rear cover into position over the gauge assembly. Thread the front cover onto the bolts, ensuring that the wires and connector block stay inside this cover as it is seated down onto the beam surface. Assemble washers and nuts but before tightening, apply sealant round the edges of the front and rear covers. Push into the gap and tighten the bolts just enough to snug the lockwashers down (shown is Sam Park of Taeshin, Korea).
 Test and calibrate
Apply power, measure the output of the complete silo weighing assembly and correct for the material in the silo by selecting and installing one or more resistors from the four supplied. Enter your silo data (capacity, graduation size etc.) into the indicator's calibration memory and wait until the silo is empty (or as empty as you ever want it to be). Acquire the silo's dead load value in the indicator, unload your delivery truck into the silo and enter the delivery ticket weight as the calibration value. That's it. You are ready to go!
 Use it every day
Congratulations. You now have a silo weighing system. Use it every day to check your inventory. Never run out of material again. The people at Sinelli started using it right after their first delivery and have loved it ever since. SiloWeigh can do a job for you too.
SiloWeigh.Net and SiloWeigh use the same gauges and installation technique. When it comes to connecting to the SiloWeigh.Net database, we take over and set it up over the Internet, from our service center.
You can install SiloWeigh or SiloWeigh.Net just as easily. Contact us now.